
In order to tile a surface with multiple materials, we can use a tiling area and create a multi-tile installation. Let’s take a look how.
Apply the hexagonal installation pattern on the floor and drag your horizontal tile directly onto the area. Make sure to first activate the “fill destination area with the selected pattern or material” button in the bottom left of the components window.
Open the Floor 2D (or Wall 2D if working on a wall) and select the polyline command from the CAD toolbar. Trace the outline of the area that you would like to tile with a different installation pattern and material from the one already on the floor.
We recommend using the automatic snaps on the vertices of the already installed tiles to facilitate the drawing of your polyline. Complete the drawing automatically by right clicking and selecting “Close”.
NB. The first line that you draw for your polyline must be a straight line and not an oblique one to ensure the tile installation will be applied in the correct direction.
After closing the polyline drawing, select the command “Create tiling area” from the pop-up window that automatically appears; if the window doesn’t appear, you can right click directly on the polyline and select the same command (if this command is not present, click “esc” and check that your polyline is closed; this is a necessary step).
Select the “Empty Area” option (this option will allow you to drag and drop both installation patterns and tiles into the area).
Next, open the “Patterns” tab of the Components window and drag the random staggered pattern that you prefer onto the area.
Remember to select the “Fill destination area with selected pattern or material” button and to choose the correct rotation in the bottom left of the window before dragging the laying pattern onto the area. Select the “Coverings” tab in the Components window and make sure that the “Change similar tiles” button is selected.
Select the desired tile and drag it onto the colored area of the dynamic laying pattern.
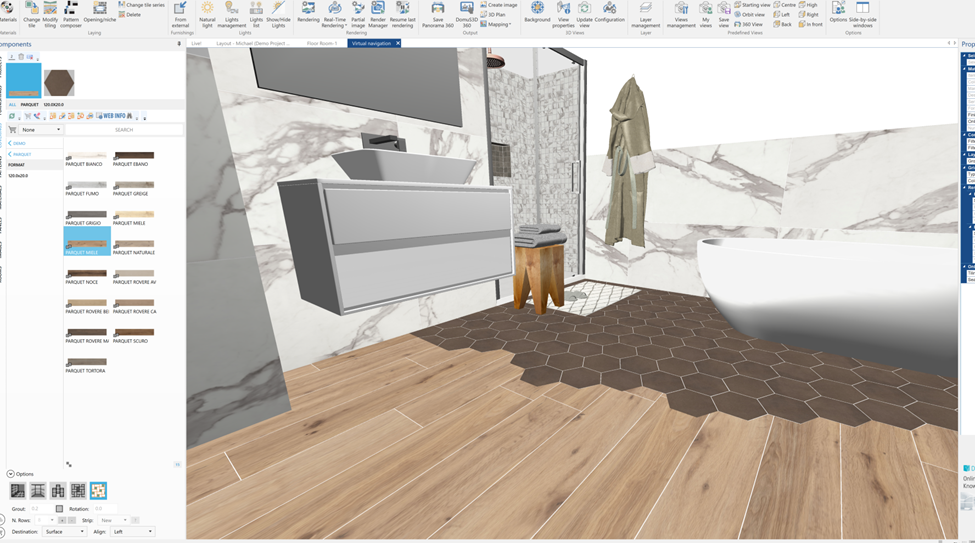
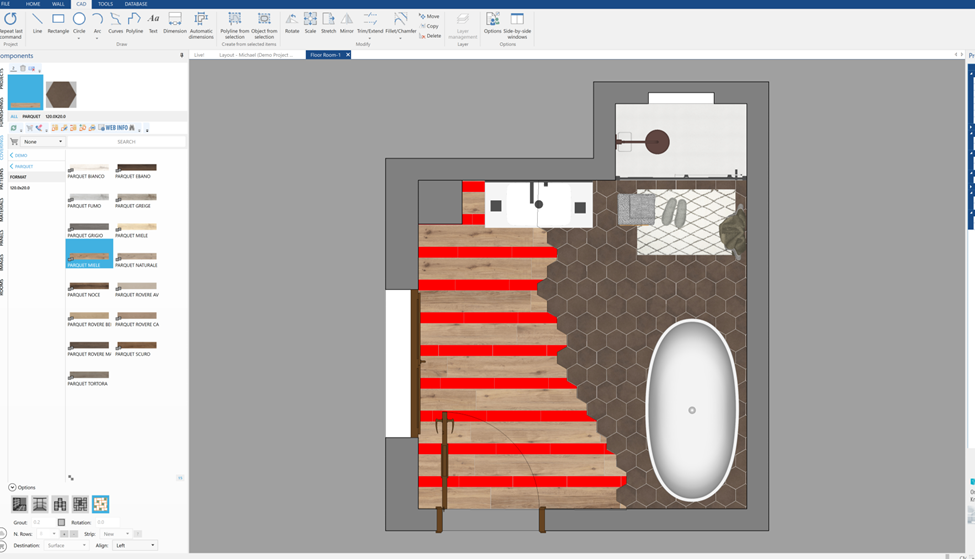 Repeat the procedure for the other tile(s) in the pattern.
This article is valid for the 2018 version and later.