
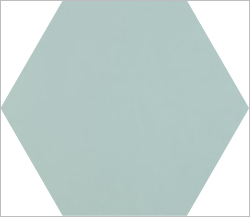
Before inserting your tile into DomuS3D, first make sure that your image is oriented and cropped as shown in the following image:
Ensure that the image file is located on the same local disk on your computer where DomuS3D is installed.
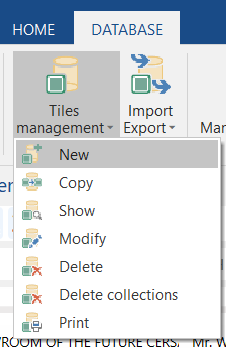
In the DATABASE tab of the Ribbon, click on Tiles Management -> New
Insert the relevant data relating to the tile:
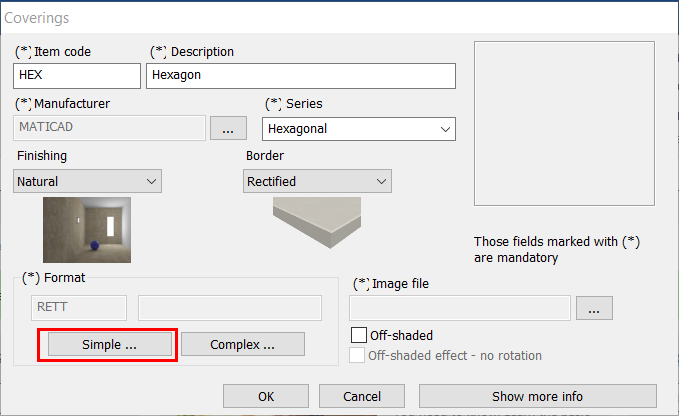
Click on the Simple button under Format. Select Hexagon.
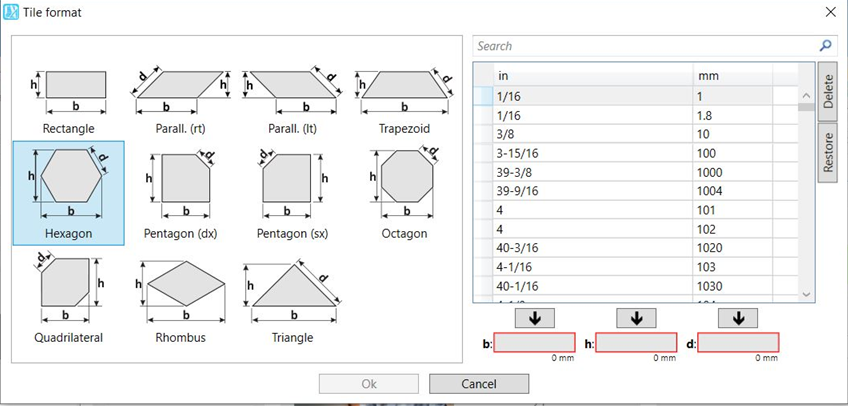
Insert the three dimensions of the hexagon: b=base, h=height, d=side
We recommend using the below formula to calculate the height and the base of the hexagon if you only know the side length:
b = d x 2 h = b x 0,866
By using these formulas, you will be sure that the hexagon will have correct dimensions within the program and will thus be applied correctly to floors and walls.
Here is an example of calculating the base and height lengths for a hexagonal tile with side length of 6 inches:
b = 6 x 2 = 12 in h = 12 x 0,866 = 10.39 in
Click OK when done.
Next, you have to assign your image to the data. Click on the three dots under Image File and select your image file.
Close the window by clicking Ok and your hexagonal tile will be inserted into the database.
This article is valid for the 2017 version and later.