
Starting from VENUS version, there is a very useful feature available in order to create automatic dimensions on wall tiles Open a wall in 2D (in the Navigation window, click the right mouse button over a wall, and select command Floor/Wall/Surface 2D). Then get to the CAD section of the Ribbon, and select command Dimension->Automatic dimensions.
You will approach the mask you can see in the next image, where the Application will ask you what do you want to measure, and which way.
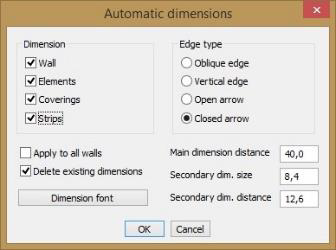
The Dimension group allows you to select the items that you want to measure.
The Main and secondary dimension distance allow you to decide how far from the wall you want to draw the dimensions.
Apply to all walls allows you to automatically draw dimensions in all walls without replicating the command.
The result you’ll get is available in the next image:
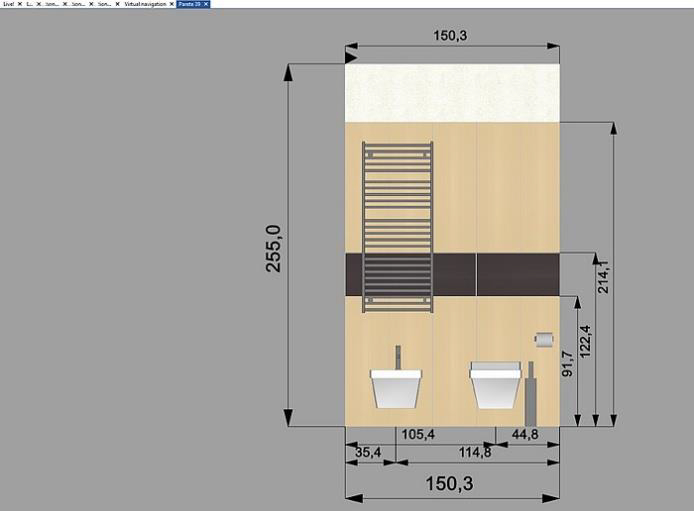
Consider that, from this moment on, every printout (or technical printout) you will print will automatically contain those dimensions.
If you do not see dimensions over the furnishings, this means that you downloaded those elements before year 2016. If you want to see measures for them, search for the elements in the Components window, double click on them in order to open Properties window, and enable the flag called: Automatic floor dimension and Automatic front dimension. Close and save the element, then draw the dimension again.
Note: if you make modifications to the structure of the project, you may need to update the automatic dimensions you formerly placed.
This article is valid for DomuS3D® 2017 and later versions