
To create interior walls that divide your room, you can use the “New Wall” command. You can start from one of the perimeter walls and specify the distance from the two corners to place your new wall (you can move between them using TAB key). To modify the hooking point to the wall press the P key on the keyboard.
Draw the desired outline of the wall; during the drawing phase of each individual piece, it is possible to activate the “Set thickness” command from the context menu by right clicking with your mouse. This will let you specify a different width if so desired. Once you have drawn the wall, you can stop by right clicking and selecting the “Stop” command.
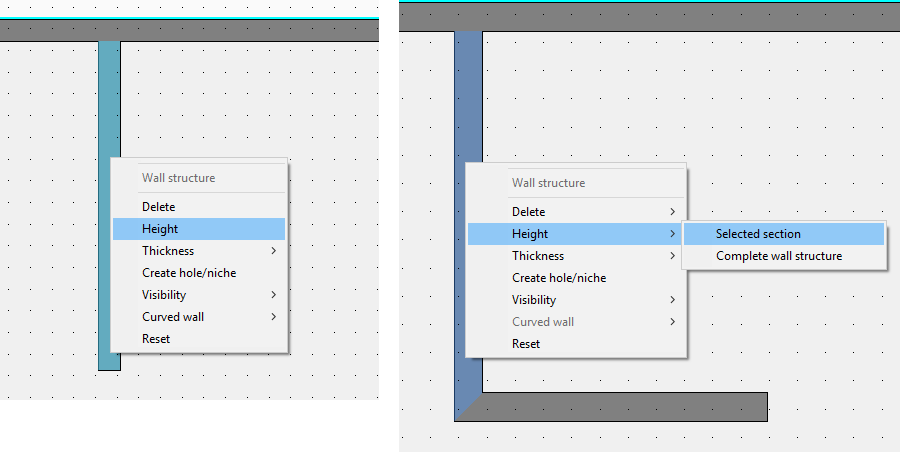
To modify the new wall’s height, select the wall and right click. Select the command “Height” and set the desired value. If the interior wall is made up of more than one segment, the modification may be applied to the selected segment or to the entire wall.
This article is valid for the 2019 version and later.