
To obtain a good final rendering, it’s important to correctly insert and adjust the lighting within your project. Especially if your room doesn’t have any windows or openings to the outside, it is important that there is at least one light source, ideally in the center of your room.
The most important characteristic of this type of light is that it does not directly shine on any specific object but rather provides ambient light to all of the items around it. You can use a spotlight as an ambient light or to simulate specific light sources like a candle or a lamp.
To insert lights, you must be in the Layout window. You can adjust a light’s settings at any time, including the luminosity and position, from either the Layout or the Navigation window.
You can insert a new light source from the Lights section of the Components window, as well. There are numerous preset lights (with varying luminosity) available here (for more information, see this article).
Drag and Drop a light into your project. Or click on the New Light button in the Virtual Navigation tab or the Layout window.
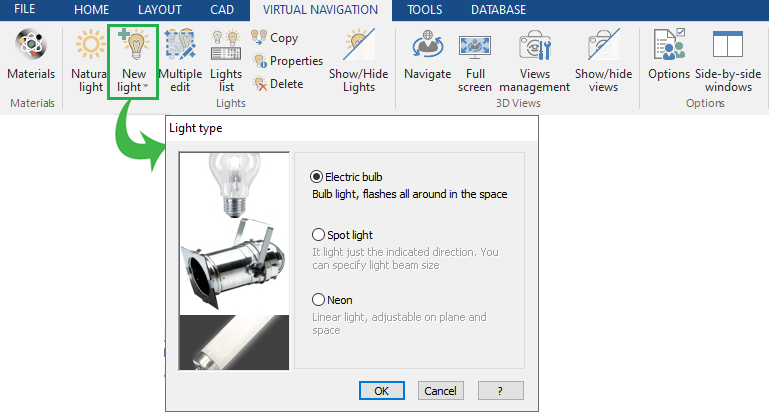
To insert a spotlight, you must indicate:
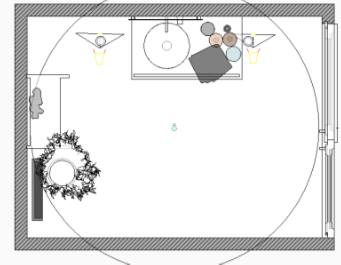
- The position of the spotlight
- The radius of the light (represented by a circumference). The size of this circumference affects the illumination of your room only in the virtual navigation window. If you increase or decrease the size of the circumference, your room will become more or less illuminated in the Virtual Navigation view. To regulate light levels in your rendering, you must change the properties of the light in the Advanced section of the light’s properties.
This article is valid for the 2017 version and later.