
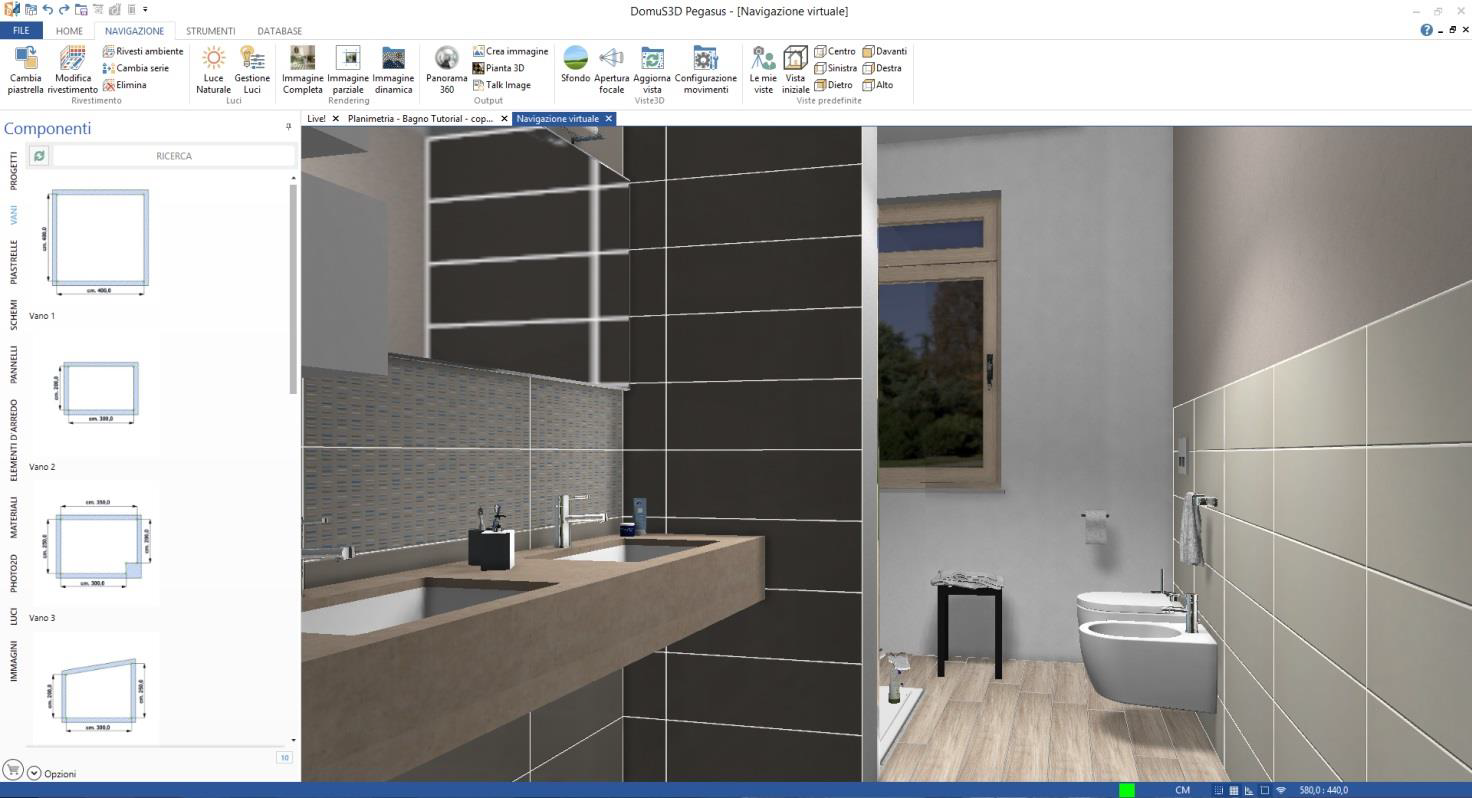
Walls have a specific material in the section that is not tiled (the upper one). Let’s proceed assigning it:
- a. Go to the Navigation window.
Open MATERIALS section of the Components window, and select Masonry level, Cemento “Intonaco cappuccino” (or any other of your choice). Drag and drop it on the wall you are currently looking at; repeat this operation for all the highlighted walls that you can see in the next image.
Note: if “Intonaco cappuccino” is not available in the Application library, you can download it in the Catalogues section of the Live! page Ref. to Catalogues->MATERIALS->ADVANCED RENDERING->MATICAD, add materials to cart and proceed with download (refer to Catalogues Download article in order to learn how to download new libraries).
- b. Once finished with the Intonaco cappuccino, search for a new material called resina (resin).
- c. In the Navigation window move the point of view in order to see the countertop, select “Resina beige semilucida” material, drag&drop it on the countertop visible faces (top and front).
Let’s save project by selecting the button on top of the Ribbon ( ) or clicking the keyboard buttons: Ctrl + S.
This article is valid for DomuS3D® 2017 and later versions